On this page
This guide takes you from a fresh install to a working radio player on your site. The built-in setup wizard does most of the work: paste your stream link, choose a look and pick where the player goes. Plan on about five minutes.
Before you start#
- WordPress 6.6 or newer and PHP 7.4 or newer.
- Your stream link (for example
https://stream.example.com/live.mp3). If your site uses HTTPS, use the HTTPS version of the stream. - Optional: a square logo for your station, 300 × 300 px or larger.
Step 1: Install the plugin#
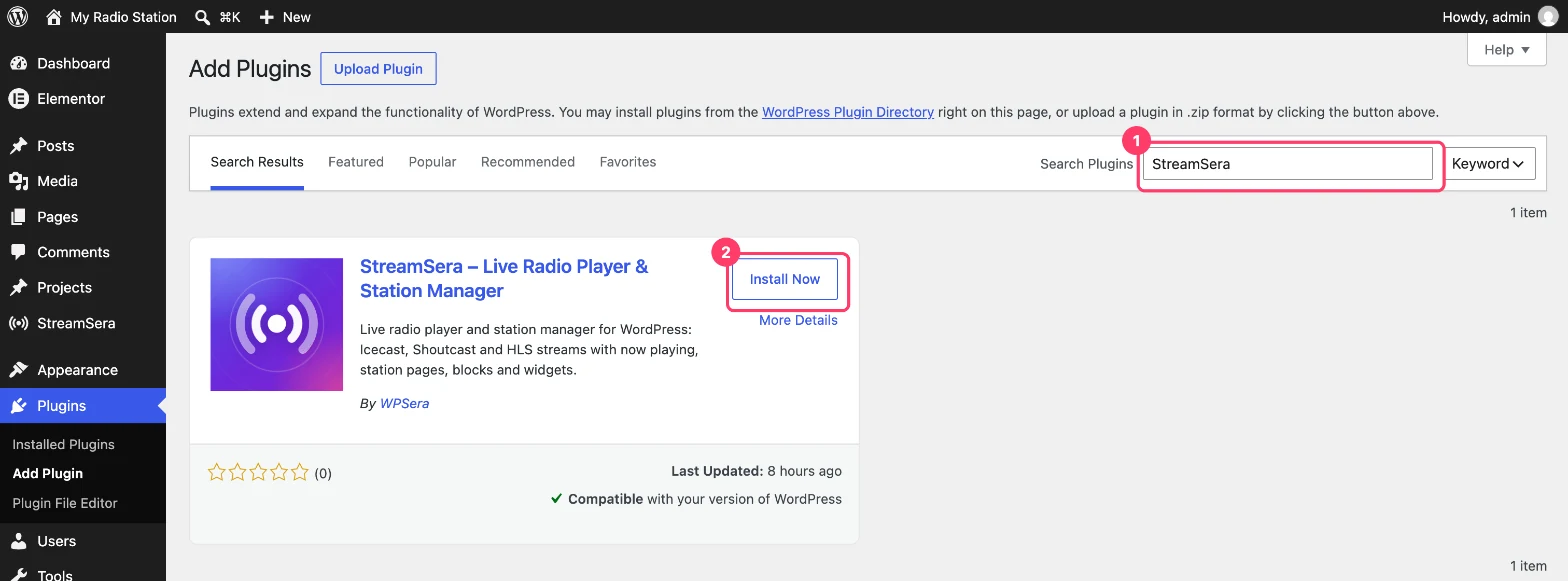
- In your WordPress admin, go to Plugins → Add New Plugin.
- Type StreamSera in the search box.
- On the StreamSera – Live Radio Player & Station Manager card, click Install Now.
Step 2: Activate StreamSera#
When the installation finishes, the button changes to Activate. Click it.
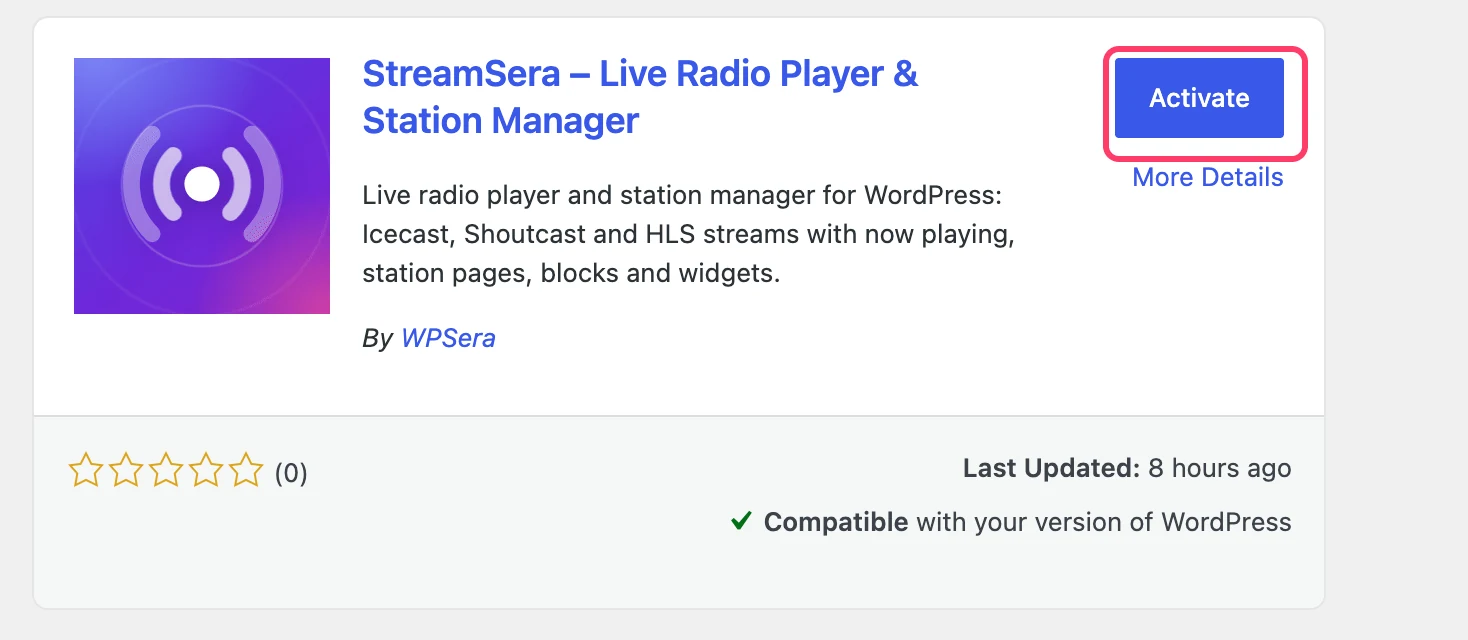
StreamSera opens its setup wizard straight away. If you have already finished the wizard on this site before, you go to the StreamSera dashboard instead.
Tip: Prefer to upload the plugin yourself? Download the zip from WordPress.org, then go to Plugins → Add New Plugin → Upload Plugin, choose the zip file and click Install Now.
Step 3: Add your station#
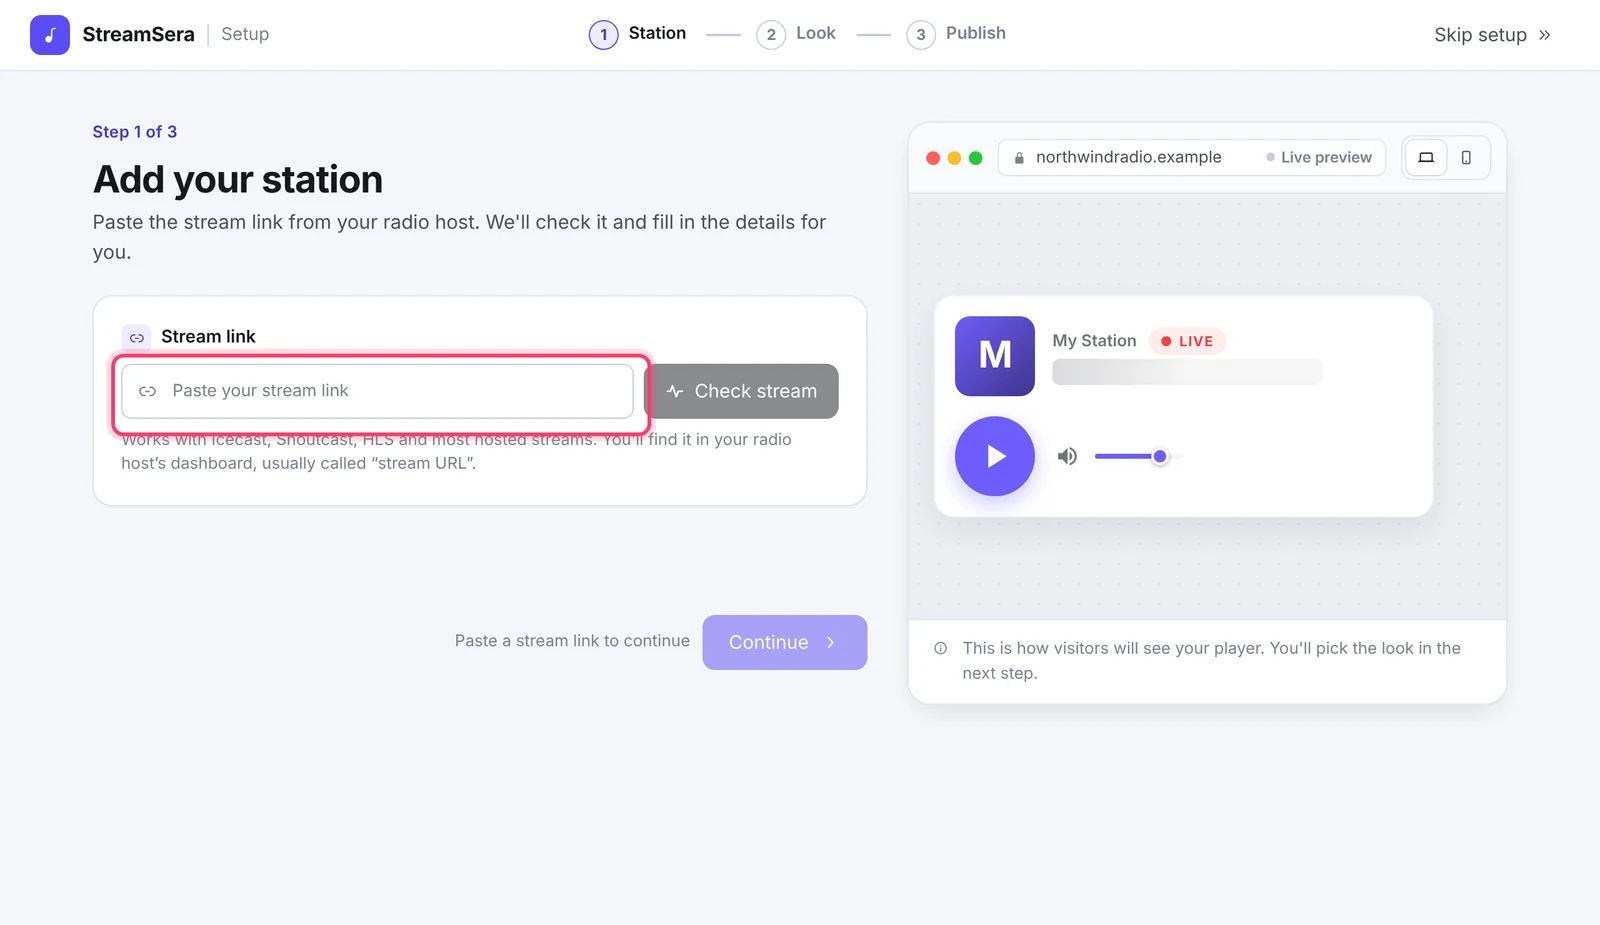
The first step of the wizard asks for your stream link.
- Paste your stream link into the Stream link box.
- StreamSera checks the stream automatically. You can also click Check stream (or Check again).
When the stream answers, you see a green Stream found box with the format and bitrate, and the song that is playing if your server reports it. StreamSera fills in the station name for you.
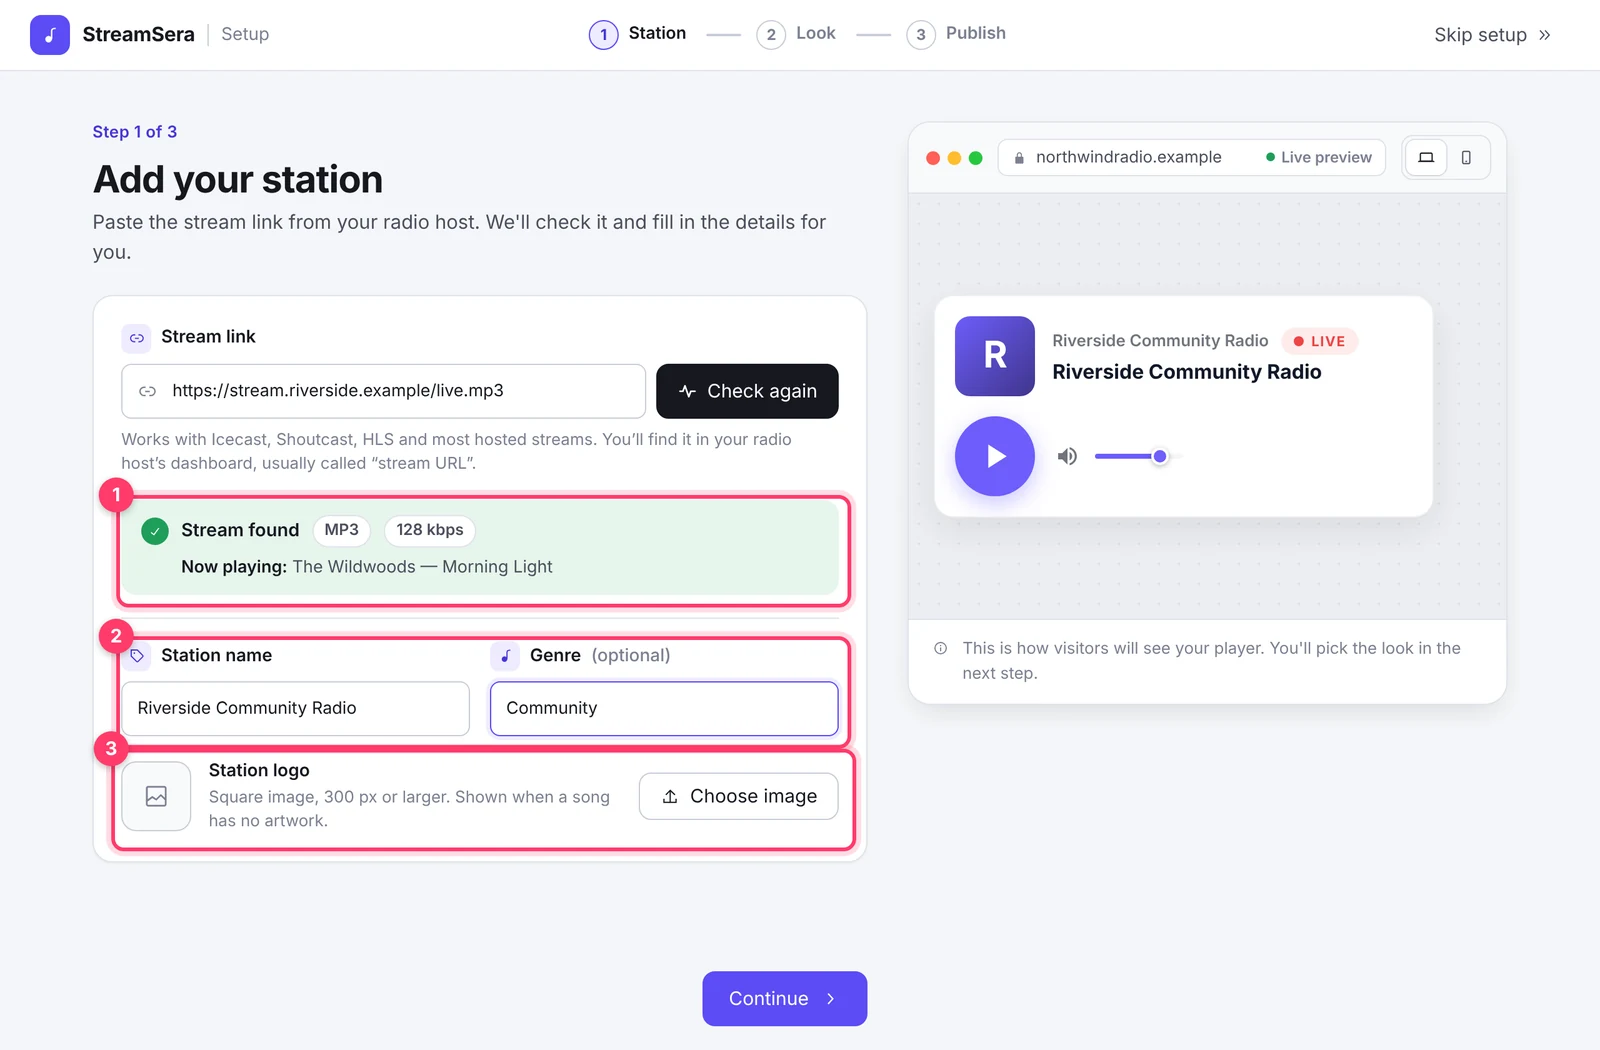
- Check the Station name and change it if you like.
- Add a Genre such as Community, Jazz or Talk (optional).
- Click Choose image to add your Station logo (optional). It is shown when a song has no artwork.
- Click Continue.
The live preview on the right shows how visitors will see the player. You can switch between desktop and phone view at the top of the preview.
Stream not found?: If the check fails, make sure you copied the full stream address, including https:// and the mount name (such as /live or /stream). On an HTTPS site, the stream must be HTTPS too.
Step 4: Choose how it looks#
Pick a starting point for your player. Everything can be fine-tuned later in the player builder.
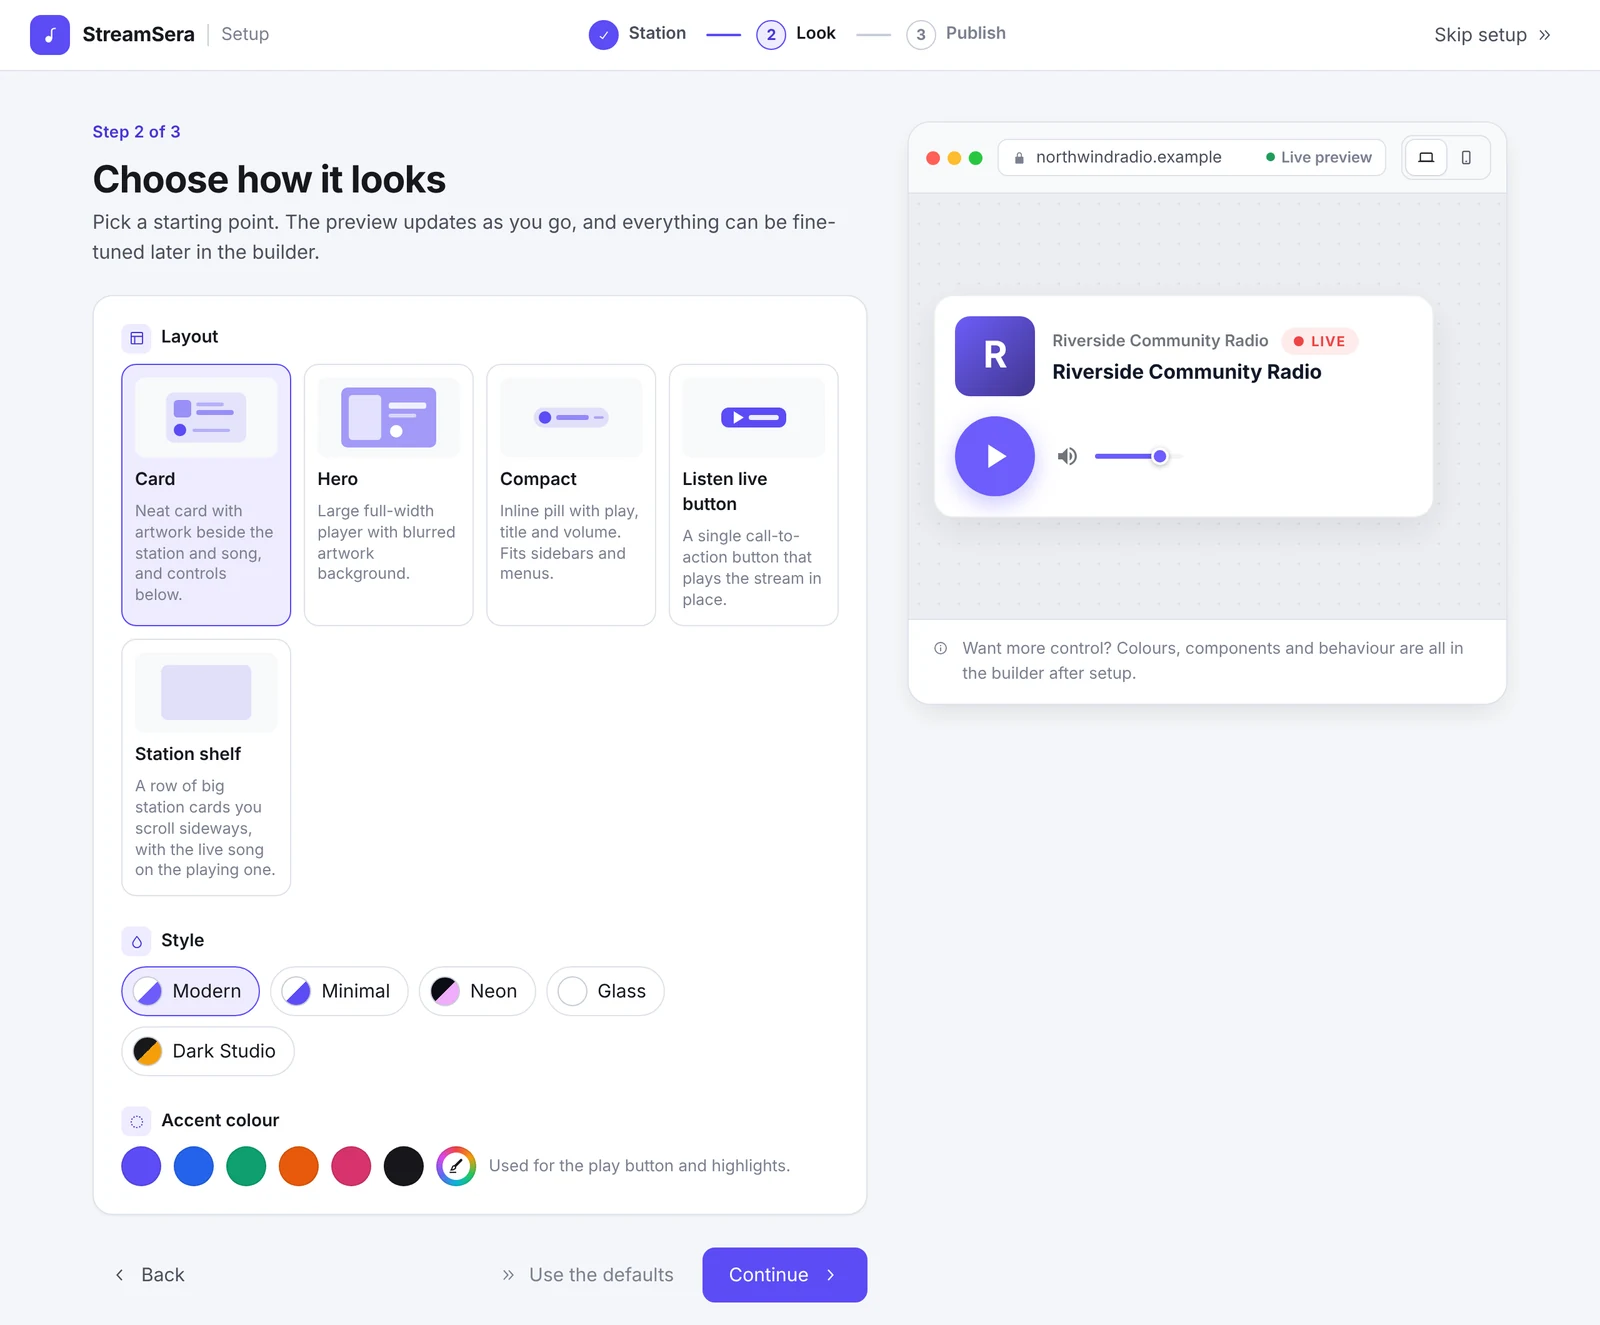
- Layout: Card, Hero, Compact, Listen live button or Station shelf.
- Style: Modern, Minimal, Neon, Glass or Dark Studio.
- Accent colour: the color of the play button and highlights. Pick a preset or click the color wheel for your own.
Click Continue, or Use the defaults to keep the suggested look.
Step 5: Put it on your site#
Choose where listeners will find your player.
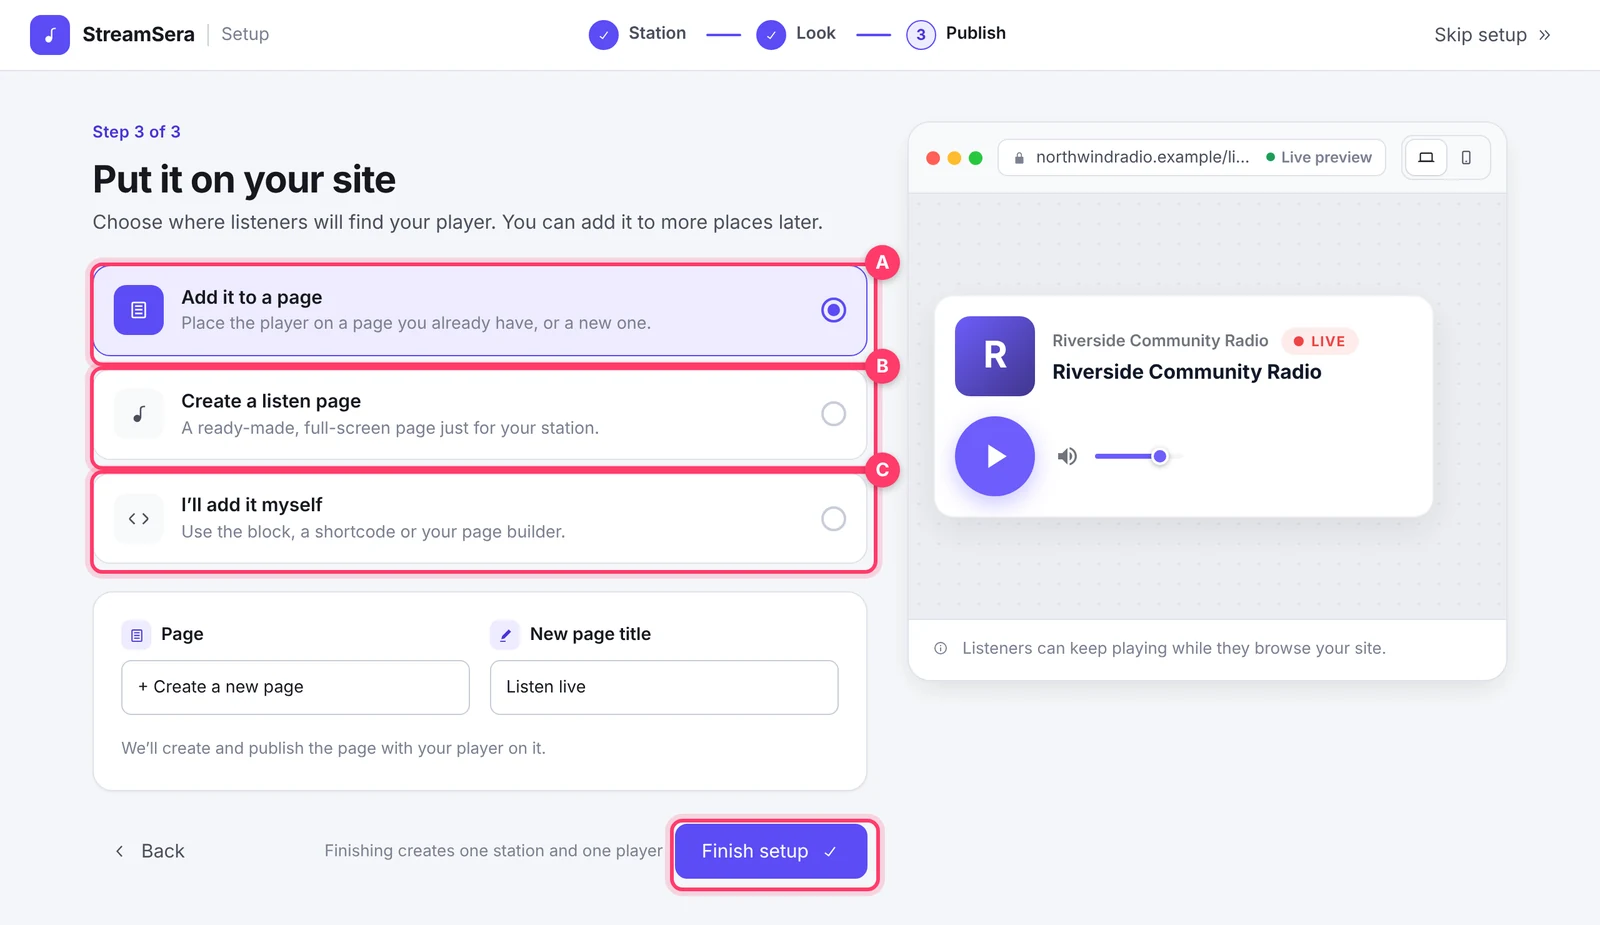
- Add it to a page (A): place the player on a page you already have, or let StreamSera create a new page. Choose the page and, for a new page, type its title.
- Create a listen page (B): a ready-made, full-screen page just for your station. It opens in its own tab, so the music keeps playing while visitors browse your site.
- I’ll add it myself (C): use the StreamSera block, a shortcode or your page builder later.
Click Finish setup. StreamSera creates one station and one player.
Step 6: You’re on air#
The last screen confirms that everything is ready.
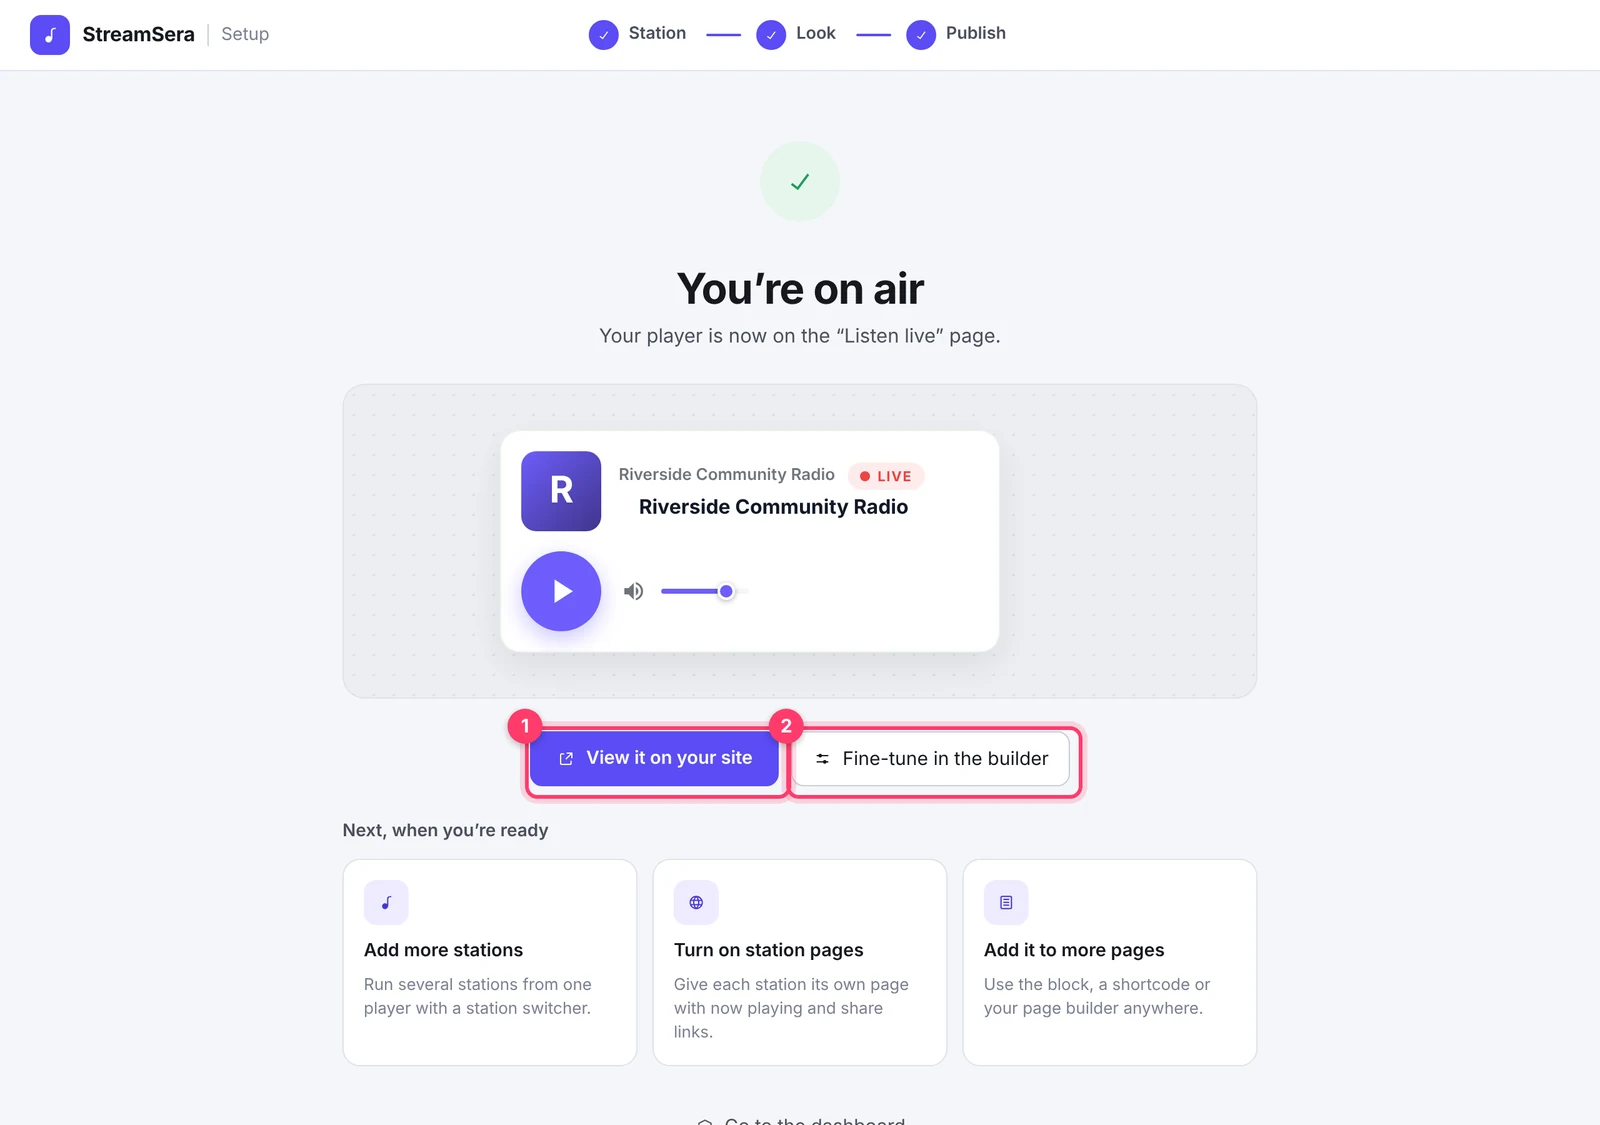
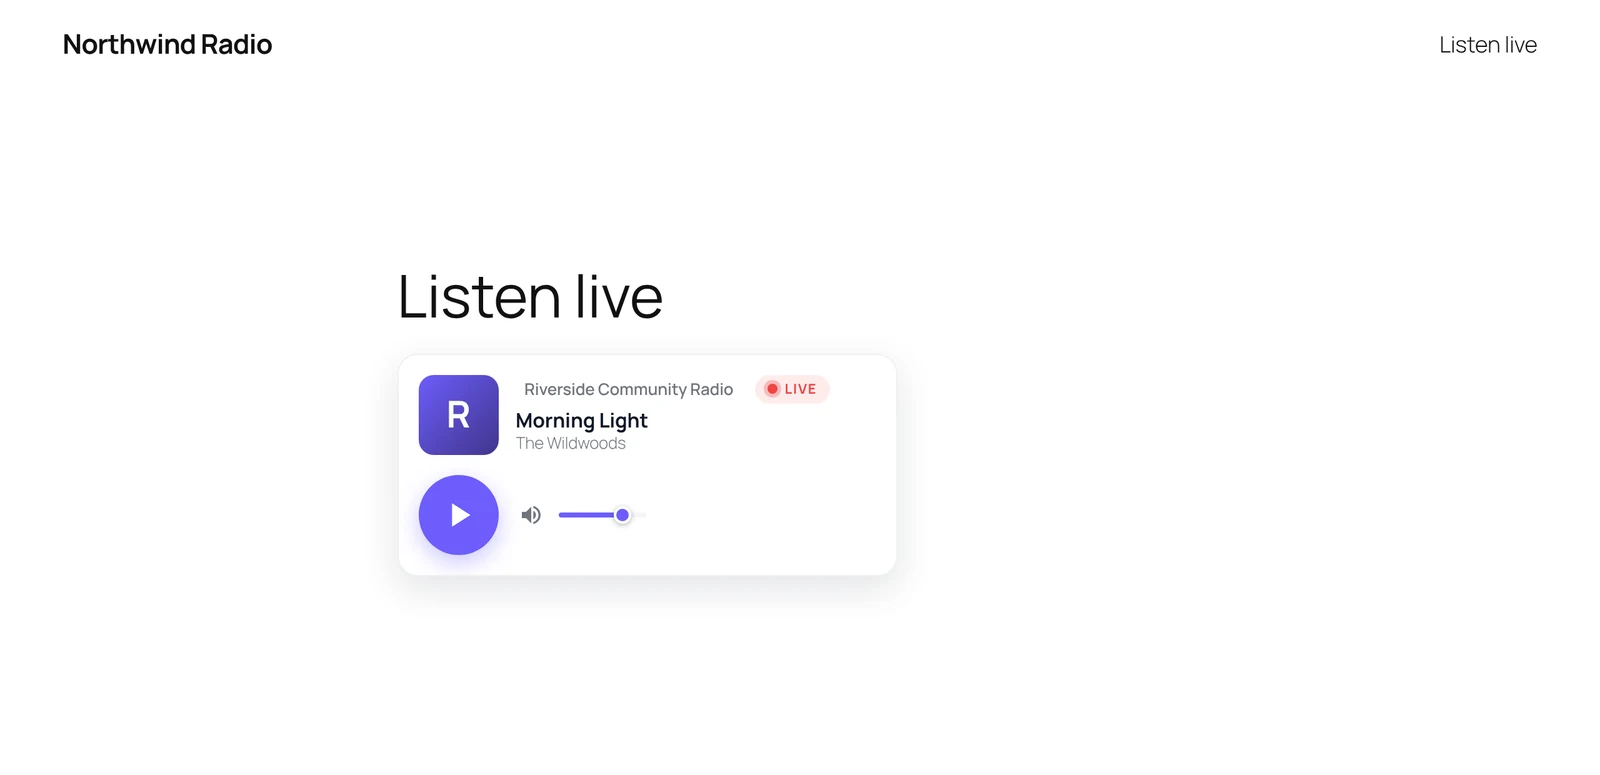
- View it on your site opens the page with your player.
- Fine-tune in the builder opens the player builder, where you can change colors, fonts, the parts that are shown and more.
- Under Next, when you’re ready you can add more stations, turn on station pages or add the player to more pages.
Run the wizard again#
You can run the setup wizard any time, for example to add another station with its own player. Go to StreamSera → Dashboard and click Run the setup wizard in the Get on air box. To skip the wizard, click Skip setup at the top right; you can add stations and players by hand later.
What’s next#
- Get to know the StreamSera dashboard.
- Want schedules, song requests, a sticky player or listening statistics? Try StreamSera Pro free for 3 days.