
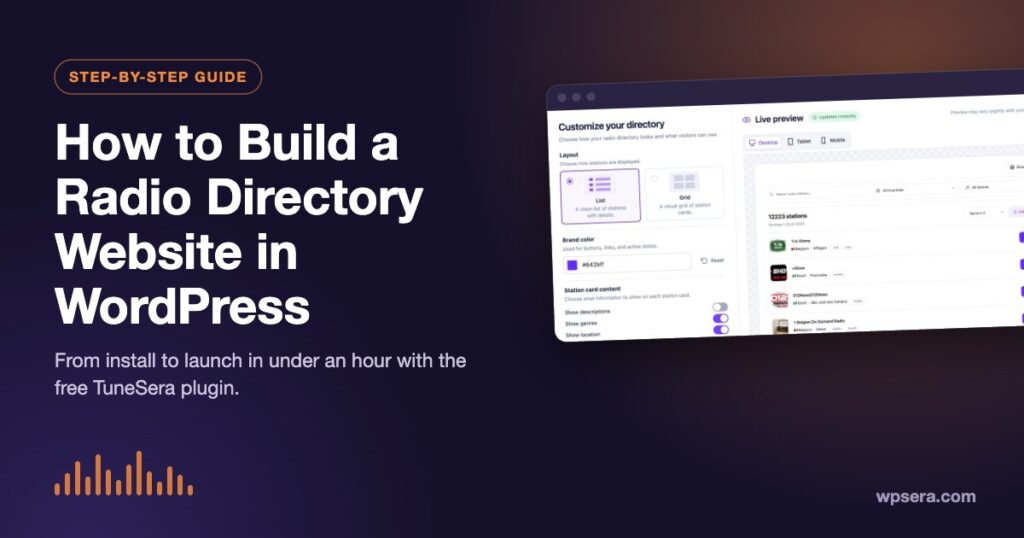
Want to build a website where visitors can search, browse and listen to hundreds of radio stations? A few years ago that meant custom code, a database of streams and a player that broke every time someone clicked a link. Today you can do it in WordPress in under an hour.
In this guide you’ll build a complete radio directory website in WordPress using the free TuneSera plugin. By the end you’ll have a searchable directory page, stations imported from the countries you choose, a page for every station, and a sticky player that keeps playing while visitors browse.
New to TuneSera? Read Introducing TuneSera for an overview of what the plugin does.
What you need
- A WordPress site running WordPress 6.6 or newer and PHP 7.4 or newer
- An administrator account
- Any well-built theme (the optional TuneSera theme is designed to pair with the plugin, but it isn’t required)
- About 30–60 minutes
Tip: if your site is already live, try the steps on a staging copy first so you can experiment with layouts and imports freely.
Step 1: Install and activate TuneSera
- In your WordPress dashboard, go to Plugins → Add Plugin.
- Search for TuneSera.
- Find TuneSera Internet Radio Directory by WPSera and click Install Now.
- Click Activate.
You’ll find a new TuneSera menu in your sidebar with Dashboard, Stations, Import Stations, Locations, Genres and Settings. The first time you activate the plugin, WordPress takes you straight to the setup wizard.
Step 2: Run the setup wizard
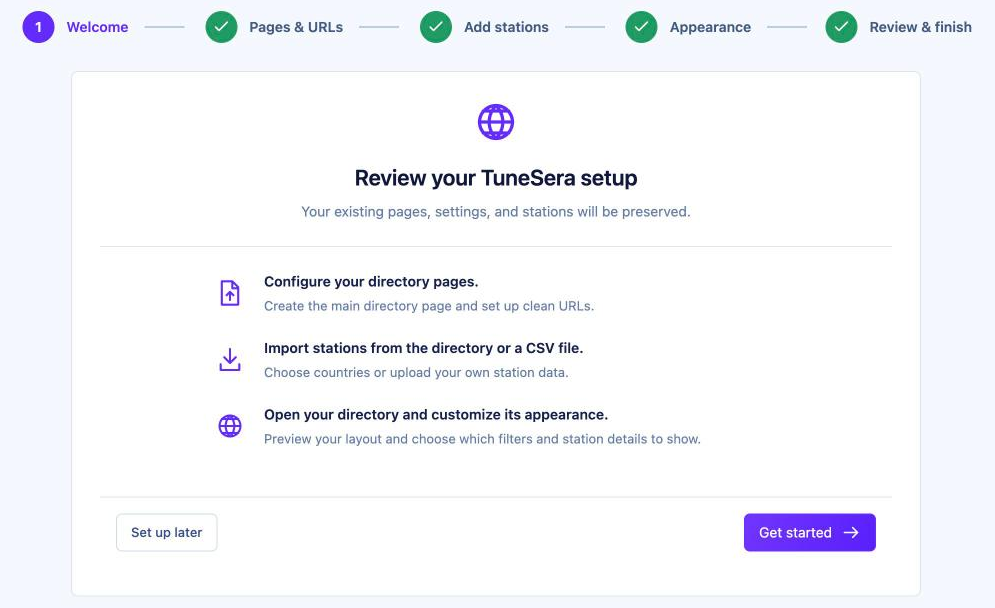
The setup wizard does most of the heavy lifting. It has five steps: Welcome, Pages & URLs, Add stations, Appearance, and Review & finish. You can click Save and exit at any time and continue later.
Pages & URLs: choose where your directory lives
Pick an existing page or let TuneSera create a new directory page for you. Then set the directory slug (the last part of the address, such as /stations/), the default sort order (alphabetical or newest) and how many stations show per page. The Preview URL shows exactly where the directory will appear.
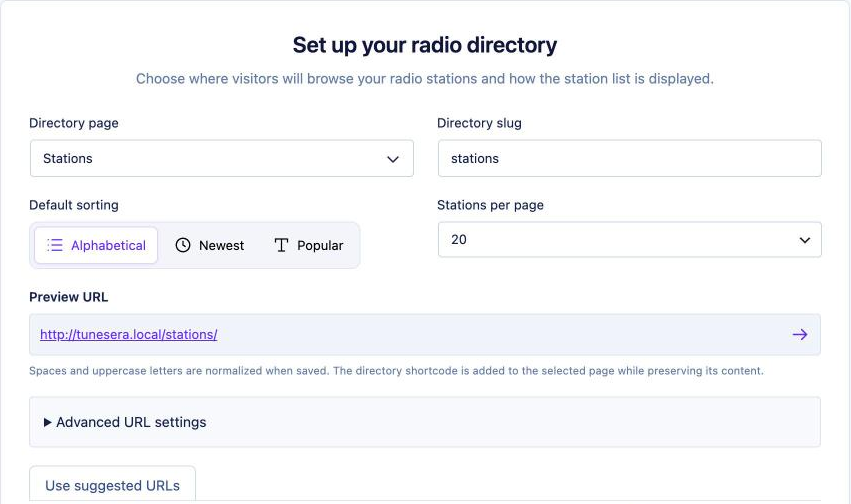
SEO tip: choose short, descriptive slugs now. Changing them after launch changes the addresses of existing station and archive pages, so it’s easiest to get them right at the start.
Add stations: import your first countries
On the Directory tab, tick the countries you want. The free plugin bundles 1,186 stations from 30 countries, and importing them doesn’t contact any outside service. Click Review import, check the summary, then Start import.
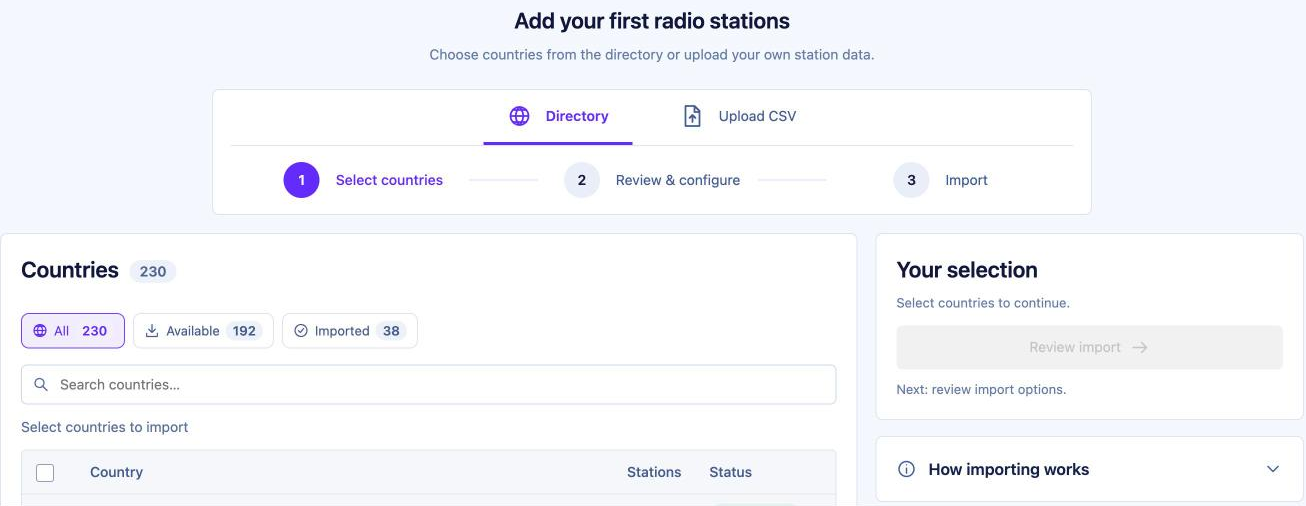
Start with one or two countries to see how your directory looks. You can always import more later, and big imports keep running in the background while you continue.
Appearance: pick a layout and brand color
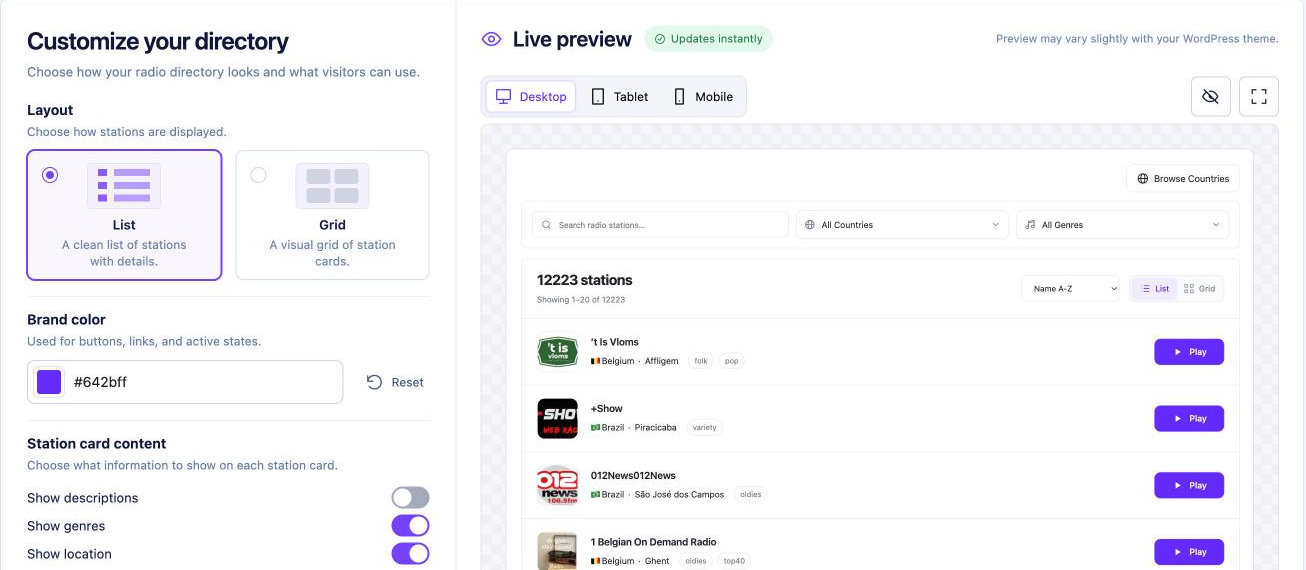
Choose a List or Grid layout, set your brand color, decide whether cards show descriptions, genres and location, and pick which filters visitors see: search, country, genre and language. The live preview updates as you go, with Desktop, Tablet and Mobile views.
Review & finish
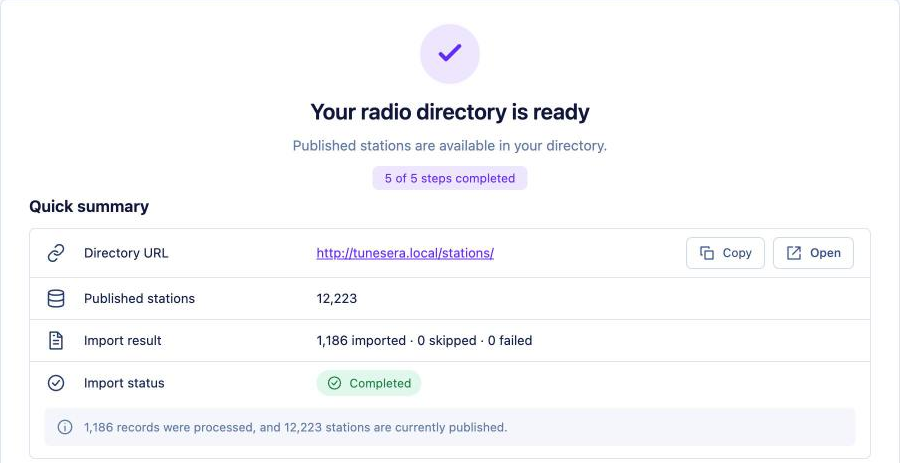
Check your directory URL, station count and import status, then click Complete setup and View directory. Your radio directory is live.
Step 3: Add more stations
With the basics in place, it’s time to fill out your directory. Go to TuneSera → Import Stations. You have three options, and you can combine them.
Import more countries
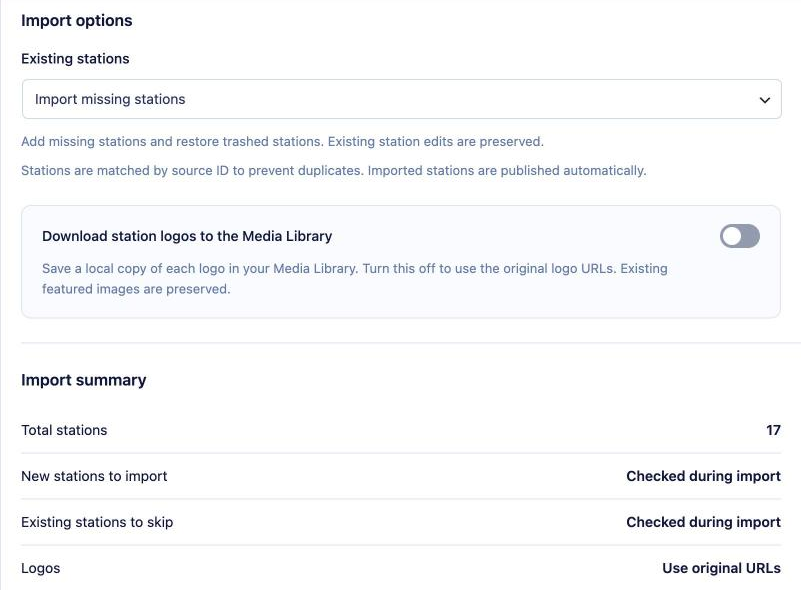
Use the All, Available and Imported filters to see which countries you still have to import. When you re-import, choose Import missing stations to add only new ones, or Update existing and import missing to refresh station details too.
Upload your own CSV
If you already keep a list of stations, save it as a CSV. Each row needs a station name, a stream URL and a two-letter country code. Download the sample CSV from the import screen to see the expected columns. (With TuneSera Pro you can map any column names, so you don’t need to rename your spreadsheet.)
Add stations by hand
For your own station or a few hand-picked favorites, go to TuneSera → Stations → Add New Station. Fill in the name, stream URL, logo, location and genres, and use the built-in stream tester to make sure it plays before you publish.
Don’t worry about duplicates. TuneSera matches stations by their source ID, so importing the same station twice won’t create a copy, and stations you added by hand are never changed by an import.
Learn more: Import stations by country, Import from a CSV file and Add and edit stations.
Step 4: Fine-tune the look of your directory
The wizard gives you a great starting point. For more control, open TuneSera → Settings:
- Layout → Directory: set the default view, let visitors switch between list and grid, choose grid columns for desktop, tablet and mobile, and add optional country, division, city or genre sidebars.
- Layout → Station cards: choose what each card shows, such as logo, description, genres, location, language and frequency.
- Design → Colors: apply a preset (Default, Ocean, Forest or Sunset) or set each color yourself.
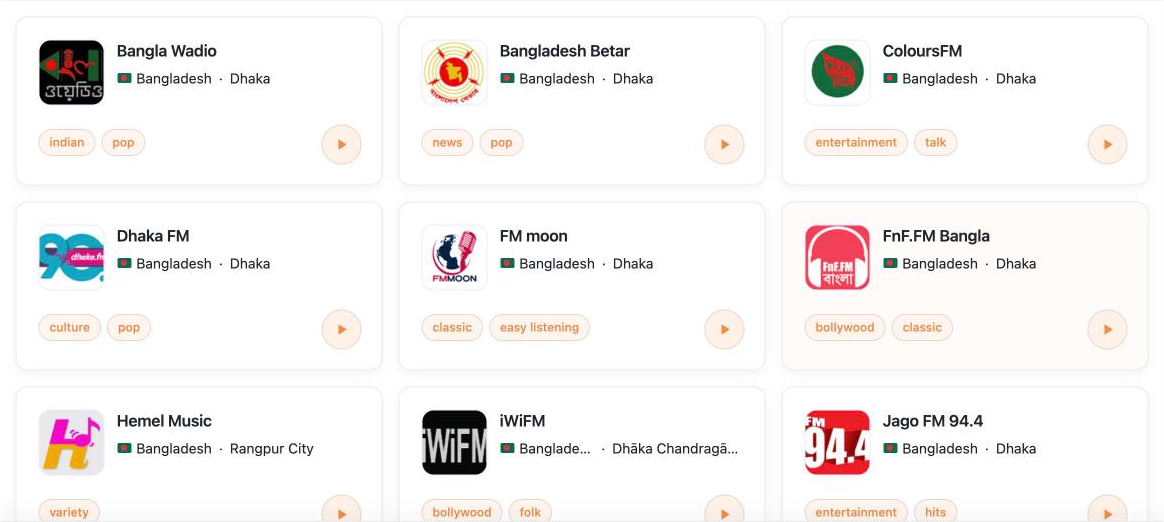
Keep cards simple. Logo, name, location and genres are usually enough, and a cleaner card is faster to scan.
Step 5: Set up the player
TuneSera’s sticky player appears as soon as a visitor presses play, and keeps playing as they move around your site. Go to TuneSera → Settings → Player to choose which controls are visible, set the starting volume, and decide whether playback should resume when a visitor returns. Volume and the last station are remembered automatically, and if a stream drops, the player reconnects on its own.

Note that TuneSera never autoplays audio. Browsers require a visitor to click before sound starts, and that’s better for your visitors anyway.
Step 6: Add the directory to your menu
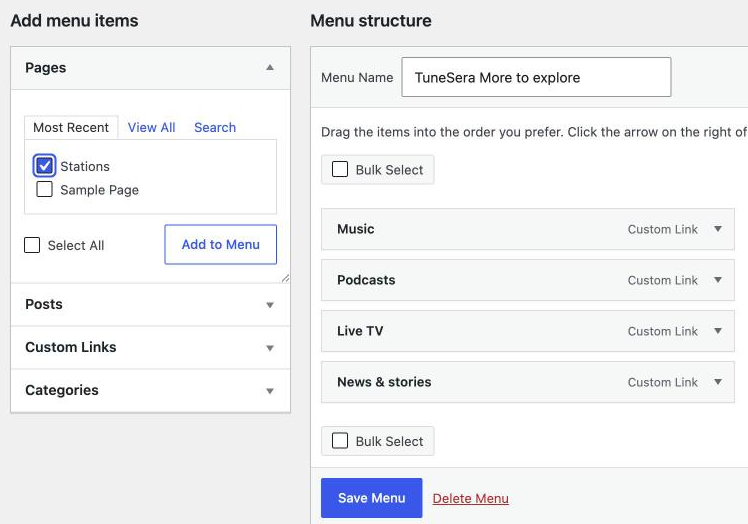
Make your directory easy to find. The quickest way is TuneSera → Dashboard, where the Getting started checklist has an Edit menus link that opens the right screen for your theme.
- Classic themes: go to Appearance → Menus, tick your directory page under Pages, click Add to Menu and save.
- Block themes: go to Appearance → Editor → Navigation, add a link to your directory page and save.
Step 7: Your pre-launch checklist
Before you share your new radio site, run through this quick checklist:
- Play a few stations from different countries to confirm the streams work on your site.
- Open a station page and a country archive to check that breadcrumbs, logos and links look right.
- Test on mobile. Most radio listening happens on phones.
- Check your sitemap. If you use an SEO plugin, make sure station pages and archives are included so search engines can find them.
- Clear caches (your page cache and CDN) if changes don’t appear straight away.
- Add descriptions to your most important stations. Unique text helps those pages stand out in search.
Optional: take it further with TuneSera Pro
Everything above uses the free plugin. When you’re ready to grow, TuneSera Pro adds:
- The global catalog of 70,000+ stations in 230 countries
- Local discovery, which starts visitors on stations from their own country
- Featured and popular stations, ranked by real listening on your site
- Listening analytics stored on your own site
- Extra player styles, a popup player, a sleep timer and track artwork
- Typography, spacing and button controls
Pro installs alongside the free plugin and keeps all of your stations and settings.
Frequently asked questions
How long does it take to build a radio directory website?
Installing TuneSera takes about two minutes, and the setup wizard can have a working directory live in well under an hour. Large imports may take a little longer, but they run in the background while you carry on.
Can I put the directory on an existing page?
Yes. Choose any page in the setup wizard or under Settings → URLs and Pages, and TuneSera keeps the content that’s already on it. You can also place the directory with the [tunesera_directory] shortcode.
Can I list only stations from one country or genre?
Yes. Import only the countries you need, or use the [tunesera_stations] shortcode with attributes such as country, genre or language to show a filtered listing on any page.
What if a station won’t play?
Streams can go offline, change address or use a format the browser can’t play. Use the stream tester in the station editor, and see A station won’t play for the most common fixes.
Stuck at any step? The TuneSera documentation covers every screen in detail, and the WPSera team is happy to help.

Join the conversation