
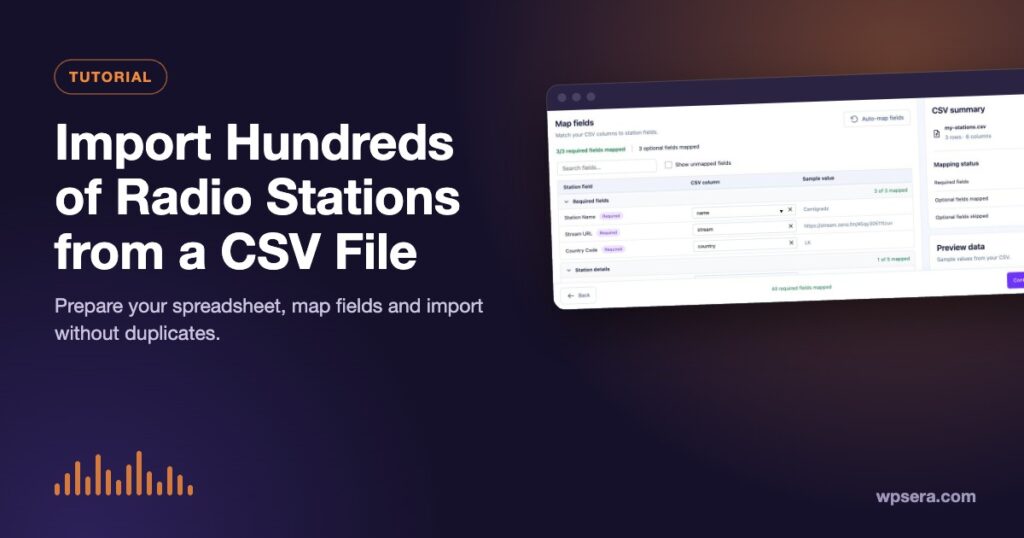
Maybe you’ve spent years collecting stream links in a spreadsheet. Maybe a radio network sent you a list of its stations. Either way, adding them one by one would take forever. With TuneSera you can import radio stations from a CSV file in minutes, review every record before anything is created, and re-import later without creating duplicates.
Before you start
- TuneSera installed and active (see our build guide)
- Your station list in Excel, Google Sheets, Numbers or similar
- A few minutes to tidy up the data
Step 1: Download the sample CSV
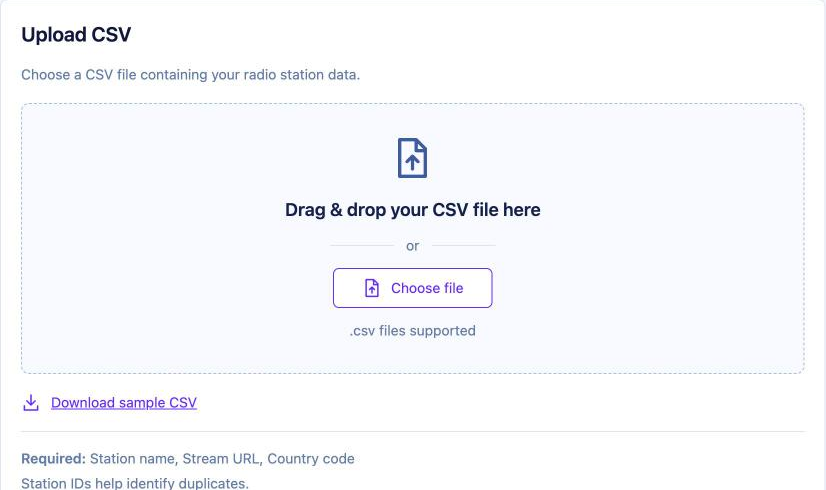
Go to TuneSera → Import Stations, open the Upload CSV tab and click Download sample CSV. Open it in your spreadsheet app. It shows the column names TuneSera understands.
Step 2: Prepare your data
Every row needs three values. Rows missing any of them are skipped and listed in the import report:
| Required field | What to enter | Example |
|---|---|---|
| Station name | The station’s display name | Radio Example FM |
| Stream URL | A full http:// or https:// stream address | https://stream.example.com/live |
| Country code | A valid two-letter country code | GB, US, BD |
Add as many optional fields as you have, such as description, genres, language, city, frequency, logo, website and social links.
Don’t skip the station_id column
Add a station_id to every row, for example your own reference number. TuneSera uses it to recognize stations you’ve imported before. Without it, TuneSera builds an ID from the row itself, so changing any value in a row makes it look like a brand-new station next time.
Save it correctly
Save or export the file as CSV UTF-8, comma-separated, with the column names in the first row. Some regional settings save CSVs with semicolons; convert those to commas. The maximum file size is 10 MB, or your server’s upload limit if that’s lower.
Step 3: Upload and map fields
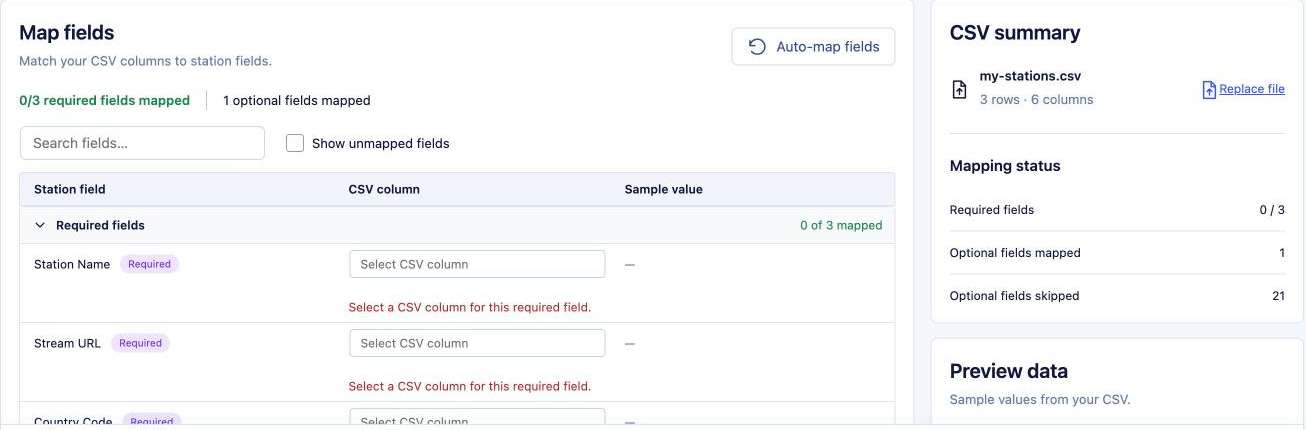
Drag your file onto the upload area (or click Choose file) and click Continue. On the Map fields step, check that your columns are recognized.
- Free plugin: your file needs the sample column names.
- TuneSera Pro: map any column names. Click Auto-map fields, then pick the matching column for anything left over. Sample values from your file help you check each match, and you can mark a field “Do not import”.
Step 4: Review and import
In Review & import, check the countries found in your file, the import summary and the record preview. Then choose what happens to stations you already have:
- Import missing stations adds only new stations and leaves existing ones untouched.
- Update existing and import missing also refreshes existing stations from your file. It overwrites manual edits to imported fields, so choose it only when your file should win.
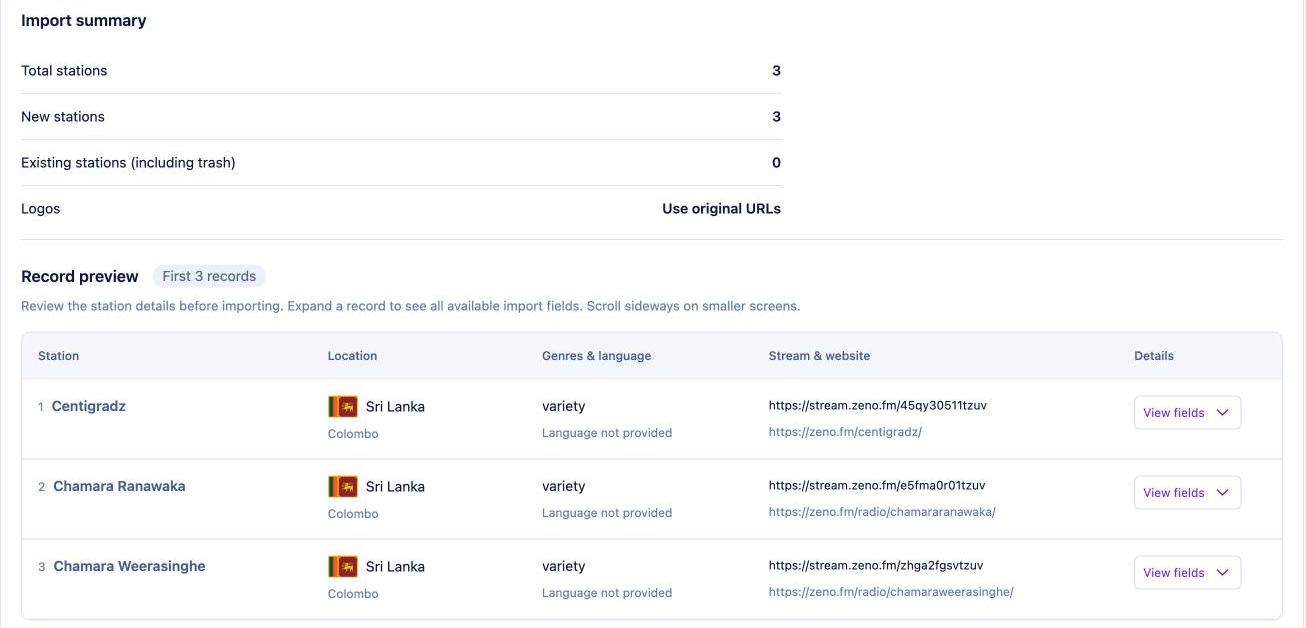
Click Start import. Imports run in the background, and imported stations are published automatically. With Pro, you can also save logos to your Media Library during the import.
Step 5: Check the results
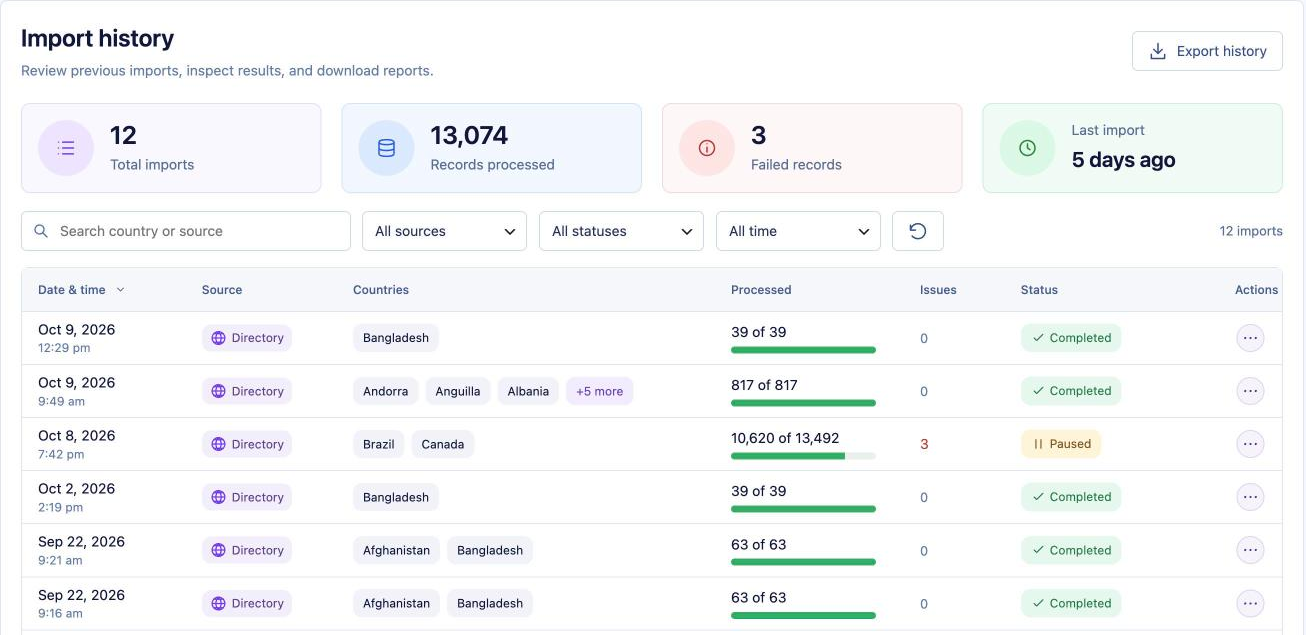
The import summary shows stations imported, trashed stations recovered, existing stations skipped, updated stations, failed rows and duplicates created (which should stay at 0). Open Import history to view the report, retry failed stations, see the stations an import created, or download the log.
Troubleshooting
- “Upload a UTF-8 CSV containing a header row and comma-separated columns.” Re-save the file as CSV UTF-8 with commas.
- A record needs a station name, stream URL and country code. Fix that row and upload again.
- No countries detected. Use two-letter codes in the country code column, not country names.
- Duplicates created. Check your CSV for repeated or missing station_id values.
Re-importing safely
Keep your spreadsheet as the master list. When you add stations or fix stream links, upload it again. Thanks to station_id, existing stations are recognized (even ones in the Trash) and stations you added by hand are never changed by an import.
More detail: Import from a CSV file, Map CSV columns to station fields and Handle duplicates and existing stations. Wondering whether you need Pro? See Free vs Pro.
Frequently asked questions
Can I import a Google Sheets file?
Yes. In Google Sheets, choose File → Download → Comma-separated values (.csv), then upload that file.
What happens to my uploaded file?
Uploaded CSV files are stored privately on your site for up to 30 days, then removed automatically.



Join the conversation